Overview
MSI features used in the example below
- Agate cluster
- A40 GPU
- Interactive GPU partition
- JupyterLab Interface
- Open OnDemand
- Custom Python Environment
Find the procedure in the tabs below
- 1. Use the Mamba Software Package Manager
- 2. Identify The Software To Be Installed
- 3. Request an Interactive GPU session via Open OnDemand's Cluster Feature
- 4. Run Mamba to Install the Software
- 5. Make the Custom Kernel Selectable by Assigning a Display Name
- 6. Configure and Launch the Notebook
- 7. Connect to the Jupyter Notebook
- 8. Select Kernel
For certain specific applications, a special kernel is needed to run the code in the entire notebook. This special kernel is often custom built using a package manager (conda/mamba) or installer. When we execute code in a selected cell, the code runs within this custom kernel and sends the output back to the cell to be displayed. When creating a new notebook from the Jupyter Notebook dashboard, we need to select this custom kernel that is able to run the code.
The next step is to determine the software packages you need and use a software package manager/installer to create a virtual environment that supports all the software packages including all their dependencies. The package manager we are going to use is called ‘mamba’ which is a variant of conda package manager. The software packages we need for this custom kernel are pytorch, torchvision, cudatoolkit, and ipykernel.
The software packages we need for this custom kernel are:
- pytorch
- torchvision
- cudatoolkit
- ipykernel
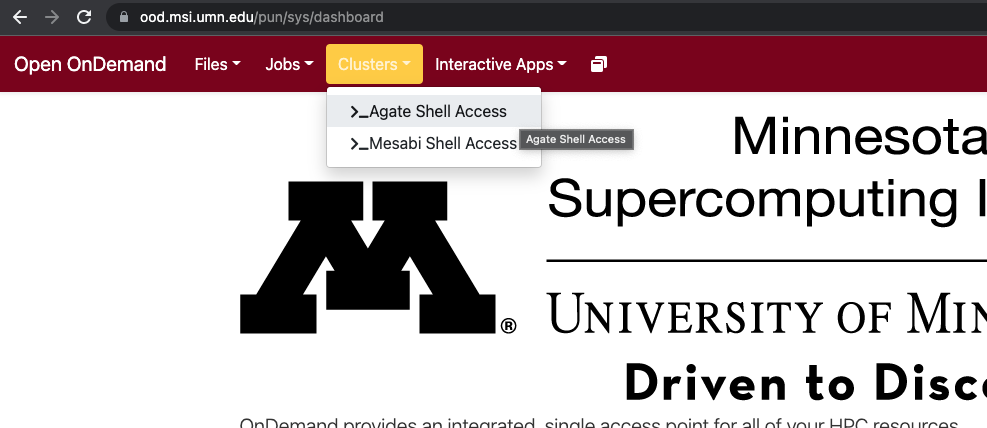
The ‘place’ to build a custom kernel is NOT the login or headnodes of any HPC cluster. This is because the computing resources provided by these nodes are limited to a very light workload. The other reason is that sometimes it can take a considerable amount of time for the software to be installed and the kernel built. Another important consideration is that you will want to have sufficient ‘tmp’ storage for the build process to stage the files during the installation. All in all, you would want to build the custom kernel using a dedicated interactive gpu session that has the hardware support you intend to use for the notebook. Select the Agate Shell Access from the 'Clusters' drop down menu, at the command line, type "srun -N 1 -n 10 --mem=32g --tmp=100g -t 120 --gres=gpu:a40:1 -p interactive-gpu --pty bash -l ". This will launch an interactive session backed by an A40 GPU from the 'interactive-gpu' partition for 2 hours (-t 120).
Once we have the interactive session running, we can start building the custom kernel using the mamba package manager. The custom kernel software will be installed in your home directory under ~/.conda/envs/, which is the default location.
load the mamba package manager at the terminalmodule load mamba
create a virtual environment named pytorch_jupyter_a40
mamba create -n pytorch_jupyter_a40
conda activate pytorch_jupyter_a40
mamba install -c pytorch -c nvidia pytorch-cuda=11.7 torchvision cudatoolkit=11.3 ipykernel -c nvidia
Setting the display name of the kernel to “pytorch_jupyter_a40”
python3 -m ipykernel install --user --name pytorch_jupyter_a40 --display-name "pytorch_jupyter_a40"
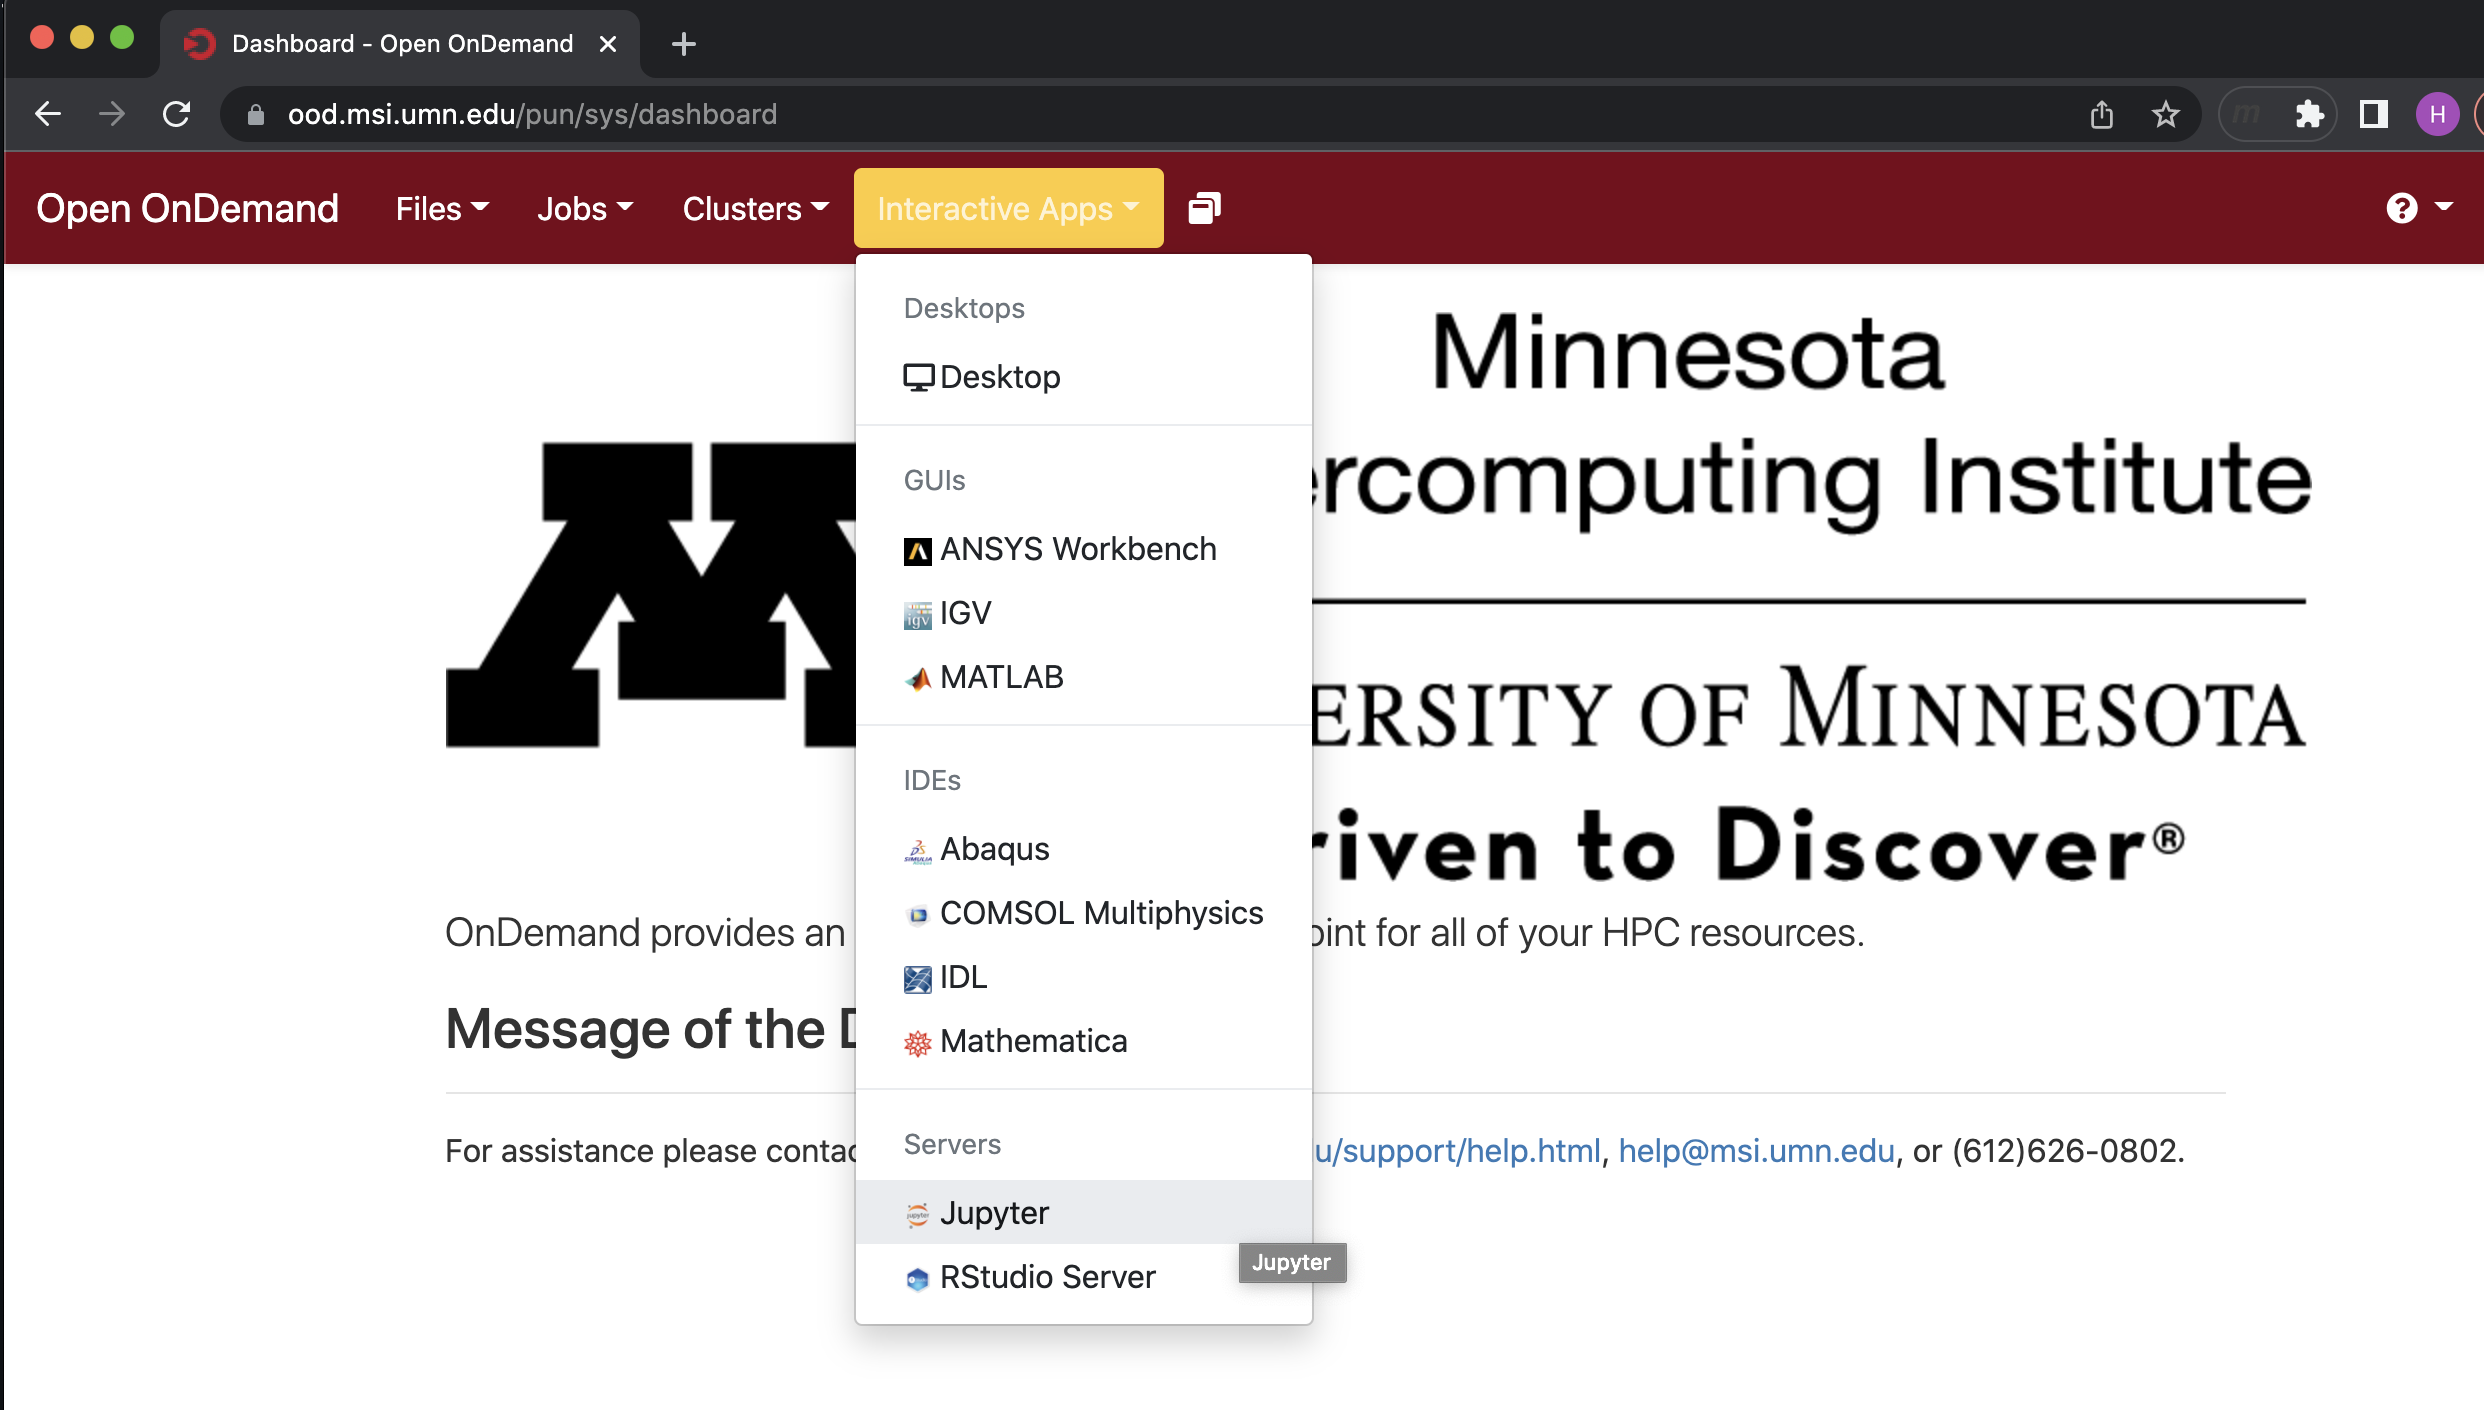
On the OOD web portal, go to Interactive App, then select Jupyter from the pulldown menu.
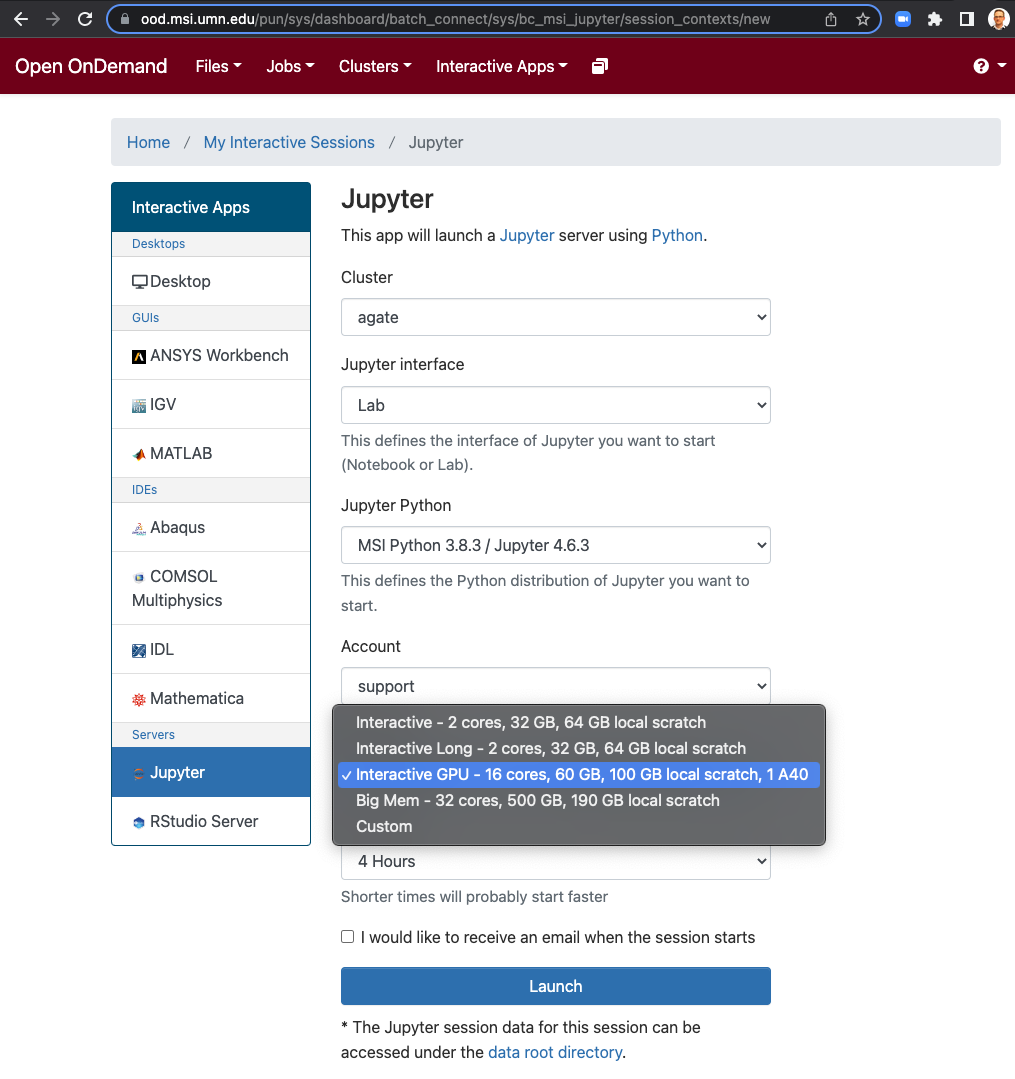
When all the parameters are set, you can deploy the notebook by clicking the “Launch” button at the bottom of the page.
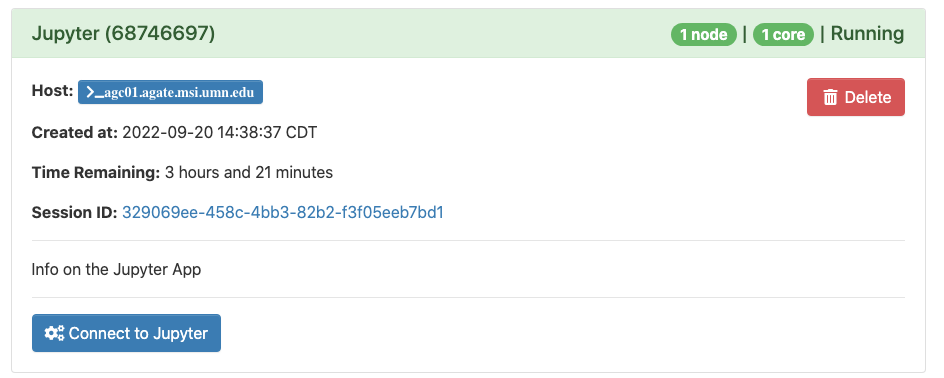
It will usually take a few minutes for the notebook to start up, but once it is ready, you should see the following screen or similar which shows the basic setting of the notebook and the “Connect to Jupyter” button. Click the button to launch the notebook!
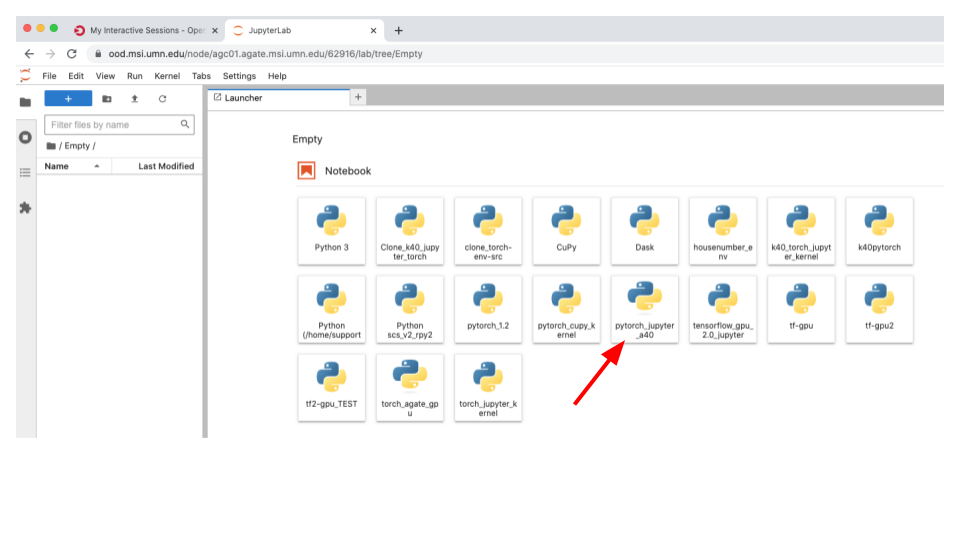
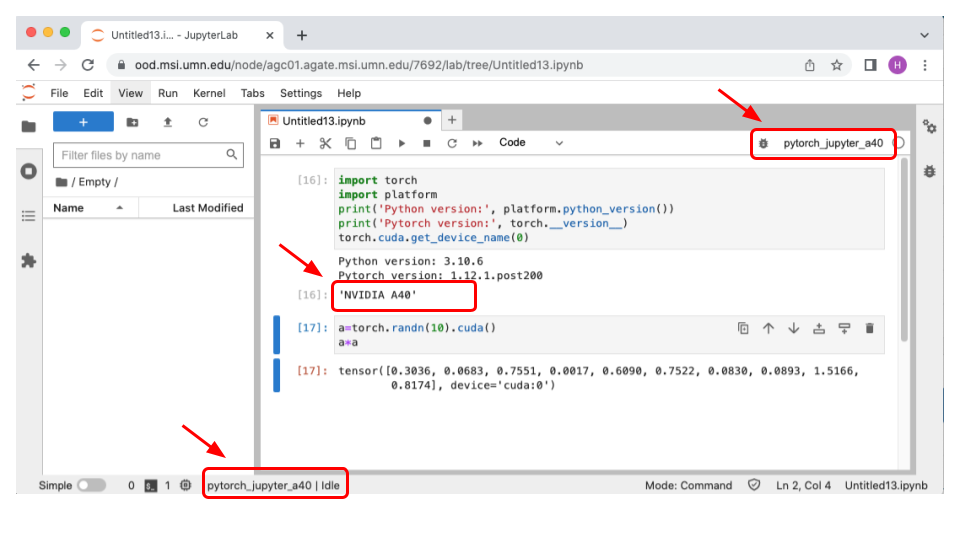
Now you should see something similar to what is showing below. You should see the custom kernel “pytorch_jupyter_a40” is loaded and that the NVIDIA A40 GPU is available to the PyTorch framework. A small test was done using a=torch.randn(10).cuda() to make sure we can use the GPU for computation.